Dispatching Rules | New Dashboard
In this section, you will be able to create profiles for your branches, assign specific delivery service providers "DSPs" to a specific branch, etc.
Dispatching Rules can be found here

How to create a profile?
Click + sign to create a new profile.
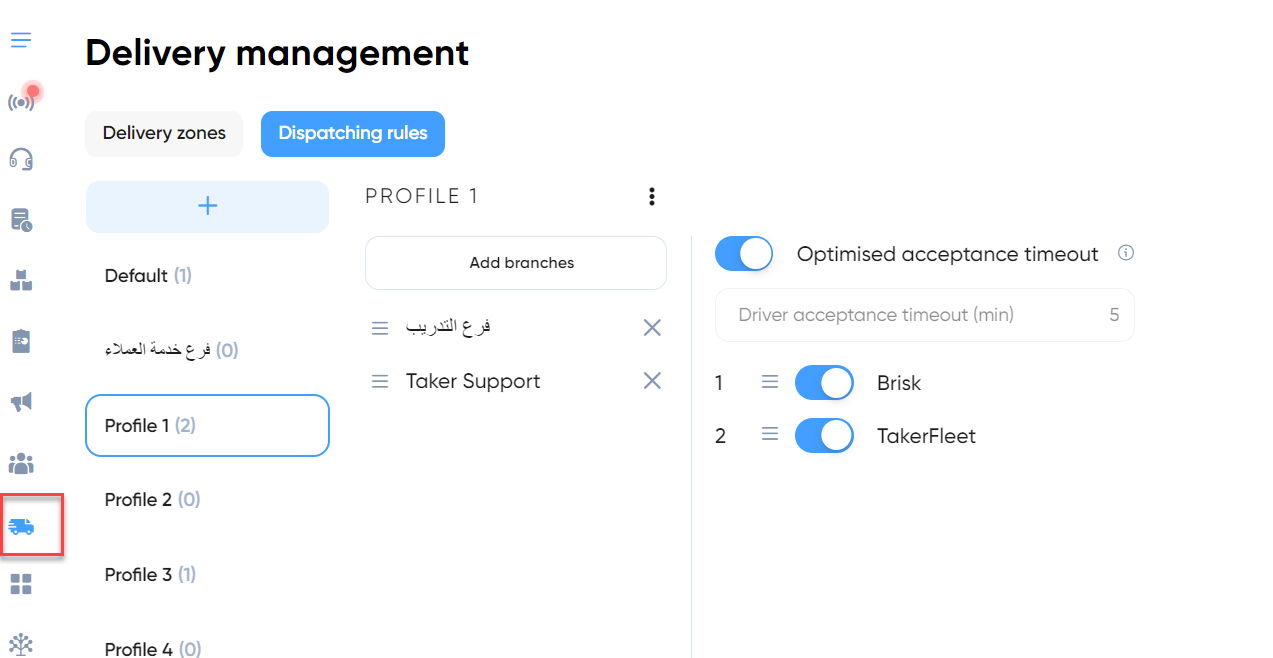
In this profile, you can add the targeted branches by clicking on "add branches" and assign a DSP for them by activating it as per the screenshot
Assigning priority for DSPs
You can change the priority to a specific DSP by dragging them up/ down as per the screenshots below.

When you have finished, it will appear in this format below :
profile 1 has two branches with the mentioned DSPs
Each active DSP in the screenshot will have 5 mins ( Driver acceptance timeout) to assign a driver )
if failed to do so, then the search will be initiated automatically to the next delivery company.
Optimised driver acceptance timeout
For operational reasons, each delivery provider could require a different timef rame to allocate a driver for your order.
For example : Brisk requires 10 minutes, therefore our team set this up for you.
if you activate Optimised driver acceptance timeout, then the above example will apply
Related Articles
Delivery Zones | New Dashboard
This article will show you how to utilize the new user interface for the Delivery management Section as a fast, user-friendly new design. In the sidebar, click delivery management. The map for the delivery zone will appear in the middle of the page ...Add New Kiosk
This page contains most of the required Kiosk Configuration in order to function properly. Please follow the links for more details. Create New Kiosk in the dashboard here Configure Kiosk Colors here Configure Kiosk Images here Configure Kiosk ...Taker Dashboard App
Taker provides you with the state-of-the-art solutions, which facilitate your business management. Benefits of Taker Dashboard App The app allows you to see restaurant orders and their details Change the order statuses Receive notifications about new ...Preparation for integration with Foodics F5
Please follow the steps below to integrate Taker Dashboard with your Foodics F5 dashboard. At Foodics side Finish setting up your Foodics F5 account, including branches, menu and payment methods. Then, create a new group in Foodics from Foodics > ...Add Kiosk
Admin Panel Go to Settings Create New Kiosk Language: which language you want to the Kiosk to display. Password : Add a password to your Kiosk Branch: which branch you will place the Kiosk at. Terminal ID: this is the ID of the payment device that'll ...