Activate Combo Meals
Your customers will be able to choose items and create their own meals from the group of items available in your Combo Meal Offer.
 Click on Create Meal :
 - Add a photo for your combo meal
- Add a name for your combo meal
- Choose the category in which your meal will be displayed.
- Included in promocode discount : enable it if you would the promo code to be applied to the combo meal
-Included in cashback offer : enable it if you would the cashback offer to be applied to the combo meal
- Choose the category in which your meal will be displayed.
- Included in promocode discount : enable it if you would the promo code to be applied to the combo meal
-Included in cashback offer : enable it if you would the cashback offer to be applied to the combo meal

Add Size : If your item has different sizes with different prices.
- Size can be renamed & deleted from here

Add item choice : Choose your item and give it a special price for your customers

Items with sizes are currently not supported in Combo Meals

Add Group : such as meat, drinks, salad, etc.
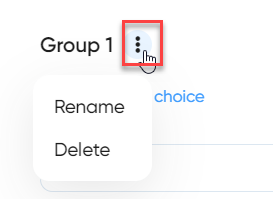
- Group can be renamed & deleted from here


Follow this example below for more details
Notice that the customer will have :
3 groups to choose from ( Meat -Salad - Drinks )
2 sizes to choose from ( BIG SIZE - SMALL SIZE)

In the below example: customer chose Vegetable with meat 30 SAR + Green Salad 5 SAR + Coca-Cola 15 SAR
Customer can choose BIG SIZE or SMALL SIZE.

The following parameters are not supported with the Combo Meals:
Promo banners can’t be applied to Combo Meals
Cross-selling items can’t be used
with Combo Meals
Wallet: Orders with combo can’t be paid fully or partially by wallet
Related Articles
Combo Meals - POS Integration
The combos checkboxes will be displayed in the dashboard Add the Combo Meal in your POS and sync the menu with Taker. Important Notes -Only combos from menu group “Taker” will be synced from Foodics -Products in Combo in Foodics can have modifiers ...Items and Inventory
Items and Inventory section allows you to enable/ disable items and combo meals for a specific branch Additionally, allows you to mark them as out of stock/ in stock for a specific branchFranchise Activation
How to Activate Check the instruction link first before submitting the Online Payment Activation form After you have received an email from TAKER that Checkout has been configured, please go to the Franchise Management section to connect branches to ...Items
Click Create item Max file size: 500 Kb. Recommended image size: 750x500 px, format: JPG, JPEG, PNG Add an image to your item Availability : Item available or not ( disabling it will hide the item from the menu) In Stock : The below image will be ...TakerGo Overview
TakerGo TakerGo is one of the smart delivery solutions provided by Taker . This service links your business & restaurant with the most effective and reliable delivery companies, so you can deliver the orders, regardless of their number, to provide a ...